Category Archives: Recipes

Make Your Own Greek Yogurt

I love Greek yogurt. I hate to admit it because it’s trendy right now, and I don’t like to like things that are trendy, but the stuff’s just good. It’s tasty and it has an unctuous texture without anybody having to add a whole lot of fat or gum Arabic. Unfortunately, it’s also expensive. You’ve probably seen those tiny little Greek yogurt tubs that are popping up in grocery stores all over the country. At least where I live, those little tubs are $1.79 for six ounces.

Now, I’m a science graduate student at the University of Minnesota, which means a couple of things.

a.) I like doing experiments.

b.) I have the budget of a grad student.

So I had the idea the other day that I’d try making my own Greek yogurt for way cheaper than those little $1.79 tubs. I tried it and it worked, so here’s how you do it:

Some yogurt.

Some yogurt.

Continue reading

Reverse Engineered Sour Cream Raisin Bars

So, the co-op grocery store in my neighborhood has this really great bakery aisle. They sell brownies and cookies individually wrapped in plastic wrap that they get from a bakery in St. Paul – and these are big fat brownies, covered in peppermint frosting and just as dense and squidgy as homemade ones. Sometimes there’s weird stuff there, like these cookie bars called hobnails and Almond Joy cookies. And every once in a while, if you hit the co-op at just the right time, you can find sour cream raisin bars.

They resemble no other cookie bar I’ve had, really. They have this pudding-like layer in the middle, the bottom is like a cake, and the top is sort of like a granola bar. Out of curiosity and since they don’t have them for sale at the co-op all the time, I decided to try and recreate them.

This is a more complicated recipe than I usually post, but the bars are well worth it.

Reverse-Engineered Sour Cream Raisin Bars

To start this recipe, you’re going to need five bowls.

IMG_1147
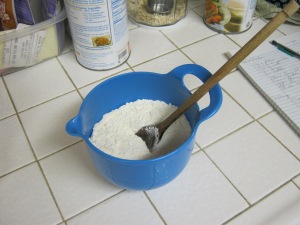
1. Cake Dry Ingredients

  • 1 cup flour
  • 1/2 teaspoon baking powder
  • 1/2 teaspoon cinnamon
  • dash salt

Just stir ’em together.

IMG_1151
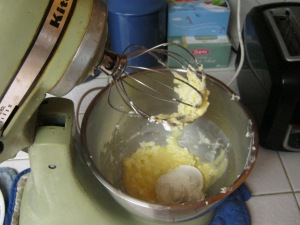
2. Cake wet ingredients

  • 1/2 cup butter
  • 1 cup sugar
  • 1 egg
  • 1/2 cup sour cream
  • 1/4 teaspoon vanilla

Beat together the butter and the sugar until the mixture is creamy (if you don’t have an electric mixer, you can use a pastry blender for this). Then add the egg, sour cream, and vanilla, and mix it up until it’s completely blended.
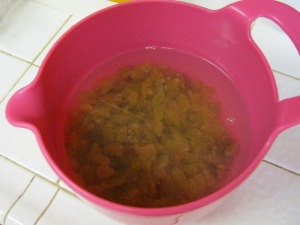
IMG_1150

3. Raisins

  • 2 cups of raisins

Pour warm water over the raisins until they are completely covered. Set them aside somewhere where they can soak.
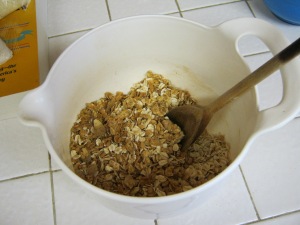
IMG_11494. Granola topping

  • 1 cup granola
  • 1 cup rolled oats
  • 1/2 teaspoon cinnamon

Just stir ’em together.

IMG_11485. The Pudding

  • 3 egg yolks (how to separate an egg)
  • 1 and 1/2 cups sour cream
  • 1/2 cup sugar
  • 2 and 1/2 tablespoons cornstarch
  • 1 teaspoon vanilla

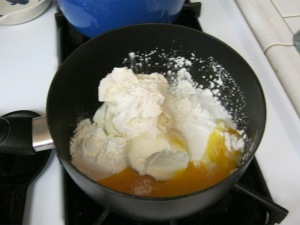
Put everything but the vanilla in a saucepan, but don’t turn the heat on just yet.

Now that you’ve got everything set up, you’re ready for the cooking part of the recipe. (Please, have everything set up before you start because this part goes fast!) Grease a 9″ by 12″ baking dish and set the oven to 350°. Add the cake dry ingredients to the wet ingredients and stir just until the lumps are gone. It should be a pretty thick batter, which you spread out in the bottom of the baking dish. Put it in the oven.

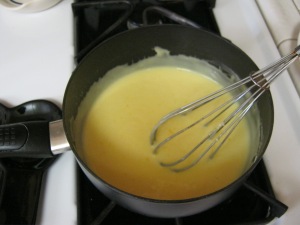
The cake needs to cook for about ten minutes, or until the cake in the middle of the pan starts looking dry on top. In the meanwhile, start cooking the pudding. Put the pan of pudding stuff onto medium heat and stir it often. It’ll look like this.

IMG_1154

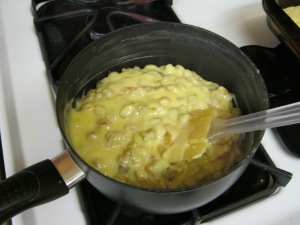
Keep heating and stirring until it starts to get thick. If you need to take the cake out of the oven and set it aside, go ahead and do that. Once the pudding is thick, drain the raisins and mix them in. Turn off the heat, mix in the vanilla.

IMG_1155

Next, it’s time to assemble the bars. I’m sorry I don’t have any pictures of this, but I was working fast. Take half of the granola mixture and sprinkle it onto the cake. Then put dollops of the pudding around the pan on top of the granola. Very gently, spread the dollops out so they make an even layer. Sprinkle on the rest of the granola mixture and pat it in.

Now you’re ready to bake!IMG_1157

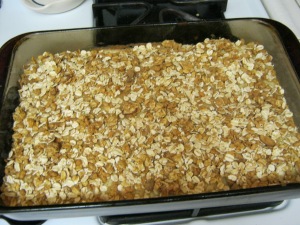
Everything is already fully cooked at this point, so all you really need is for the flavors to meld and for the granola to get toasty brown and delicious. I found 20 minutes worked well.

Let the bars cool before you try to slice them. When it’s all done, here is what you get:
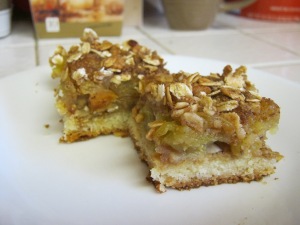
IMG_1162Enjoy!

Persimmon Refrigerator Jam

In honor of Thanksgiving, here’s a spicy, orangey-brown, autumnal recipe for you.

Like many new recipes, this one started with the question, “What do I do with all these x?”  Persimmons, in this case.  I’d happened on three Fuyu persimmons in a mixed bag of fruit and I had no idea what to do with them.  To me, they taste too sweet to eat fresh.  Jam, maybe?

Many people shy away from making jams and jellies because the canning process is difficult and requires specialized equipment.  But here’s the thing: making the jam itself is dead easy, and if you’re willing to keep the jam in the refrigerator and eat it up quickly, you don’t have to can it.  Really.  This recipe is easy.

Persimmon Refrigerator Jam

  • Three persimmons
  • Three overripe pears
  • Juice from 1/4 of a lemon
  • 1/3 cup of brown sugar
  • Cinnamon and clove to taste

Here’s what the fruits looked like.

Closeup of a persimmon’s insides.

Wash the persimmons and pears, then remove the stems from the persimmons and the cores from the pears.  Chop each fruit roughly into 5-6 pieces.  Put them into a slow cooker.

Add all the other ingredients, then not quite enough water to cover.  Cook on the slow cooker on low.  Stir every couple of hours and mash fruit down with a potato masher.

The jam should be done in about eight hours.  (Told you it was easy.)

The finished product.

Kale Chips

It’s November in Minnesota and it’s getting flipping cold outside.  (Highs in the 40’s Fahrenheit, that is.)  It makes me want to eat lots of hot soups, root vegetables … and kale.  Kale looks intimidating in the grocery store because the leaves feel like they’re as tough as a leather suitcase.  Not to fear!  If you bake kale in the oven, it will come out crispy and not tough at all.

You will need:

  • Two baking sheets.
  • One bunch of kale.
  • 3-4 tablespoons olive oil.
  • 3-4 teaspoons salt.
  • 1/2 cup Parmesan cheese.

Preheat the oven to 350°.  Grab the bunch of kale by the stem.

Rip pieces off of the leaves.  Keep going until you’re down to the midribs.

Rinse the kale pieces in a strainer and blot dry.  Add the oil, salt, and Parmesan and toss it like a salad.  Spread the mixture out evenly on the two baking sheets.

Bake the kale in the oven for 12 minutes.  They will come out looking like this:

The picture doesn’t really convey it, but these are delicious.  They taste like fresh, hot potato chips that happen to be green.

Plum Upside-Down Cake

It’s midsummer and plums are cheap right now, so I decided to do a baking experiment.

This is plum upside-down cake, which is pretty much pineapple upside-down cake but with plums.  The principle seemed like it would be the same: lay some fruit in the bottom of the pan, pour cake batter on top, cook then flip, so I decided to take James Beard’s general recipe for upside-down cake and play around with it.  Oh, yes, the experiment was a success.  This cake didn’t last very long in my apartment.

.

Plum Upside-Down Cake (Adapted from James Beard)

Fruit part:

  • Four medium-sized plums
  • 2 tablespoons butter
  • 1/8 cup brown sugar

Cake batter:

  • 1/4 cup butter
  • 1/2 cup brown sugar
  • 1 egg
  • 1 cup flour (JB calls for cake flour, but mine turned out fine with all purpose)
  • 1 teaspoon baking powder
  • 1/4 teaspoon salt
  • 1/4 teaspoon allspice and 1/4 teaspoon ground cloves (or use cinnamon or ginger or whatever spices you like)
  • 1/2 teaspoon vanilla
  • just over 1/3 cup of milk

Preheat the oven to 350º.  Wash the plums and slice into wedges.  Remove pits.  Put the 2 tablespoons of butter in the bottom of a 9-inch round baking pan, then put the pan in the oven just long enough for the butter to melt.  Take the pan back out, then sprinkle the brown sugar over the bottom.  Lay the plum wedges in the bottom of the pan (you can do it decoratively if you want).

Cream together butter and sugar until fluffy, then beat in the egg, then mix in vanilla.  In another bowl, mix flour, baking powder, salt, spices.  Add part of the flour mixture to the butter-sugar mixture and mix, then the milk, then the rest of the flour mixture.  Mix only just enough so that everything is combined.

Pour the cake batter into the pan, over the plum wedges.  Gently press the batter into the edges of the pan so it’s well-distributed.  Bake for 30 minutes or when cake in the center of the pan is springy and not wet.  Take the cake out of the over and let it cool before you try to flip it out of the pan!

Once the cake is quite cool, put a dinner plate on top of the pan and hold the edges of pan and plate together firmly.  Flip.  Once it’s upside-down, if the cake’s not coming out of the pan, you can whack it against a countertop.  If all goes well, you will have a cake with lovely wedges of plum laid into the top.  Enjoy!

What do I do with all these radishes?

I scored a bunch of radishes at the Asian food store the other day, brought them home, then realized: this is a ton of radishes.

This is only about 1/3 of the total radishes

What was I going to do with all of these?  Why did I buy so many?  You only need about one radish to slice up and put on your salad, so this pile represents about 30 salads’ worth of radishes.

Fortunately, the Internet is a wonderful place, so I went searching around for radish recipes.  Turns out you can roast them like any other root vegetable.

First, I sliced the radishes up thinly.

Added some golden potatoes, tossed them with olive oil, salt, and Italian seasoning.

After about 45 minutes in the oven at 350°, they look like this.

The flavor is still spicy like a raw radish, but much more mellow and a little bit earthy.  I think roasted radishes would make a great winter dish.

Homemade Yogurt

Here’s a neat magic trick: put a spoonful of yogurt into a bowl of warm milk, let it sit around for a while, and the whole thing turns into yogurt. I tried it this weekend.  Even though I work with microscopic organisms for a living, it still boggles my mind that this actually works.  I can’t see the little Lactobaccili doing their thing in there, pumping out acid that coagulates the milk, so it looks like alchemy.  Yogurt turns everything it touches into yogurt.

But anyway, you’re probably looking for the recipe.

This recipe comes from Lois Braun of the Hampden Park Co-op, and she explains it better than I could myself, so here’s a link to the detailed instructions.  Here’s what you’re going to need:

  • Some yogurt that says “live and active cultures” on the package.
  • A quart of milk.
  • A couple of empty yogurt tubs.
  • A great big pot.

First, make sure that all your equipment is clean so you don’t contaminate your yogurt with bacteria you don’t want.

Heat the milk just to the point of boiling on the stove.  Keep an eye on it because milk tends to burn easily.  Meanwhile, fill your great big pot with room-temperature water from the tap.  I used a jumbo crock pot that’s too big for cooking food in, and it worked well because it’s insulated.

The setup, part 1

Once the milk is boiling, pour it into the empty yogurt tubs.  Stick the tubs into the pot full of water and stir them a bit to let the temperature equalize.  The temperature of both the milk and the water bath should be just a bit hotter than body temperature, about 100º F.  Drop a spoonful of yogurt into each tub and stir in.  Then cap the tubs up, put the lid on the pot, and wrap it up in as many towels and blankets as you can.

The setup, part 2

Let it sit around for a few hours.  I tried overnight, and that worked well.

When you open it up, you get – magic! – the whole thing has turned into yogurt.  It has a delicate texture, because it doesn’t have any carageenan to thicken it up, and it is delicious.  And you can put whatever goshdanged sweetener into it you want.

Hot and Sour Tofu

My boyfriend introduced me to hot and sour paste, and boy, have I been having fun with it.  This is an incredibly easy recipe – it needs three ingredients.

  • 1/3 of a block of firm tofu (or 1/2 block if you’re really hungry)
  • dribble of vegetable oil
  • 1/2 tsp hot and sour paste

Cut the tofu up into cubes, blot with a paper towel to get the excess moisture out.  Cook in a frying pan with the oil on high heat until the edges of the cubes brown.  You want a crunchy on the outside, creamy on the inside sort of texture.  Add the hot and sour paste and just enough water to cover the bottom of the pan, stir vigorously.  As soon as most of the water has boiled away again, serve and enjoy.  It’s best when it’s very, very hot.

(Mostly) Vegetarian Chili

Textured vegetable protein is wonderful stuff.  It looks like hell, but it’s got a lovely spongy texture, it’s full of protein, and it’s delicious.  It can be a bit hard to find, so try a store where most of the customers wear Birkenstocks.

  • 1 cup textured vegetable protein
  • a big glorp of barbecue sauce
  • 2 medium onions
  • 4 cloves garlic
  • 1 package of mushrooms
  • 1 jar of spaghetti sauce
  • 1 can black beans, 1 can cannellini beans
  • 2 teaspoons chicken bouillon paste (leave this out to make it vegetarian)

Right out of the package, TVP (textured vegetable protein) is dry and crunchy.  You’re going to want to soak it.  Mix the big glorp of barbecue sauce with a couple of cups of water, add the TVP, and throw in any other flavors you might like it to pick up.  Let soak while you’re preparing the rest of the chili.

Chop the onions, garlic, and mushrooms and sauté in some butter at the bottom of a big soup pot.  When they are starting to get tender, add the beans, spaghetti sauce, and chicken bouillon.  You’ll probably need to thin it out with a bit of water.  Dump in the BBQ-TVP.  Mix it all together, bring it to a boil, then cover and turn down the heat.  Let it simmer for a while for the flavors to mellow, about 15 minutes.

It’s good with cheese.

Carrot Peanut Soup

Another one of those things that didn’t look like much, but tasted delicious.

  •  5 large carrots
  • 1 medium onion
  • 1 red bell pepper
  • 2 tbsp butter
  • 4 cups chicken broth
  • 1 cup powdered milk
  • 4 tbsp peanut butter
  • salt, pepper, chili powder, cornstarch

Grate the carrots and cut the onion and the pepper up finely.  Put all of that in the bottom of a big soup pot, along with the butter, and sauté until the onions are nice and limp.  Add chicken broth and let it come back to a boil.  Then mix in the powdered milk and peanut butter; add salt, pepper, and chili powder to taste.

To thicken the soup, dissolve about a tablespoon of cornstarch in some cold water.  Add that to the soup and stir for a minute or so.  Repeat until it’s thick enough to your liking.

Then it’s ready to eat!